

To remain competitive organizations need to share data quickly and easily. While this data must move through the organization it is important to ensure that only those individuals who require access are granted access, this access is limited to only the information required, and access is revoked when no longer necessary; also known as just-in-time (JIT) access controls. JIT access controls are necessary to reduce the risk exposure of a data breach, a costly occurrence, while also enabling maximum productivity.
Let’s explore how integrating Jira with Satori enables the sharing of data by automating the granting and revoking of access to data.
What is Jira?
Atlassian Jira was initially designed to track bugs and issues; however, it evolved to become a software development tool for agile teams. It is used in a variety of circumstances, from software development to agile project management. It helps plan, track, and discuss work objectives. Jira is also used to quickly and easily optimize workflows.
In this particular example, we explore how Jira can provide a customizable workflow for granting and revoking access with Satori.
Satori and Jira Prototype
The integration of Jira with Satori enables users to automate the granting and revoking of access to data. In our recent State of DataSecOps report we found that approximately 60% of respondents still rely on manual processes to grant and revoke data access.
Automating this process reduces human error and speeds up the sharing of data. Some of the benefits of integrating Jira with Satori include the following:
- Significantly reduces the time spent by DevOps and data engineering teams to grant and revoke access. This process occurs in real time and does not require the teams to write additional code. Therefore, engineering teams have more time to spend on providing core values.
- Increases security by enabling JIT access and reduces overprivileged access risk.
- Faster data flows between different teams allow each to optimize decisions, increasing productivity.
Read more about Access Control: The Dementor of Data Engineering and the Benefits of a Consolidated Data Access Platform.
An Example
Before getting started with this example there are a few requirements.
Requirements
- Admin access to a Satori account.
- Admin access to a JIRA account.
- Ability to deploy the example Satori API Relay server example – our example uses Google Cloud Run.
Configuration
Satori Account
- Configure and use a Satori account, including all of the features needed to connect to and secure some data.
- If you do not have a Satori account, you can use our test-drive to setup an account, or set up a demo meeting.
- These concepts are covered on our getting started page if you have never used Satori.
- You will also need to enable a Satori Rest API service account.
Satori Example Relay Server
- Deploy the example relay server from this github project.
- Follow all of the steps in the readme file.
- While we have designed it for GCP, it could be altered to run on AWS or anywhere else if needed.
- Once this relay server is correctly deployed, you can begin testing the URLs without even using Jira.
- We also recommend using Postman or a similar API client tool for testing and learning the Satori Rest API.
1. Create a Ticket
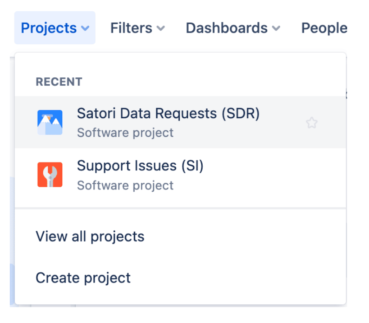
In this example we named the project Data Access Request, however, you can name the project whatever you prefer. The Jira user creates a ticket for a new Jira Project called Data Access Request.
- Log into your JIRA account as an administrator
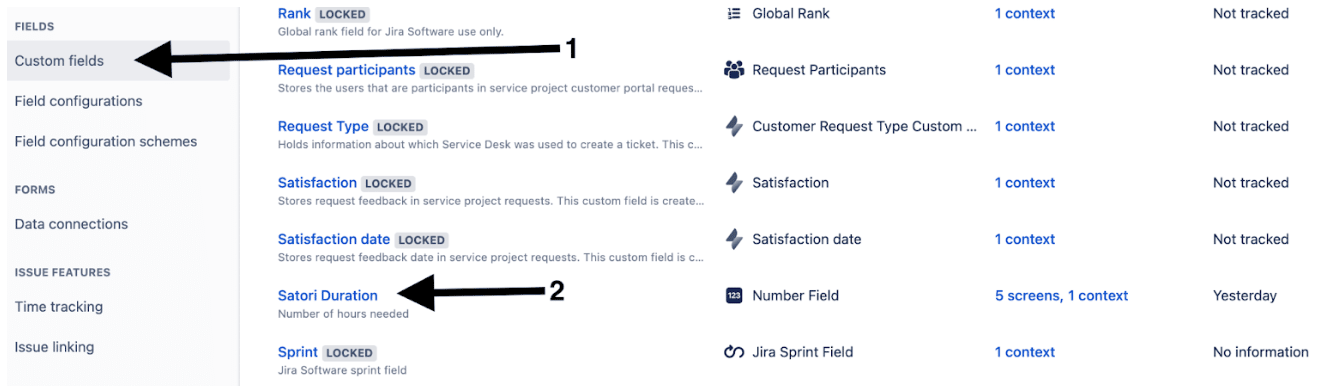
- Create a new project type called Satori Data Request
- Include at least one new custom number field, we named it duration. This is important as it defines the number of hours of data access requested.
Then use JIRA’s custom field feature to create a new field called Satori Duration of type number.
If you set this up and then try to create a new Satori Data Request record, the first part of the create screen might look like this:
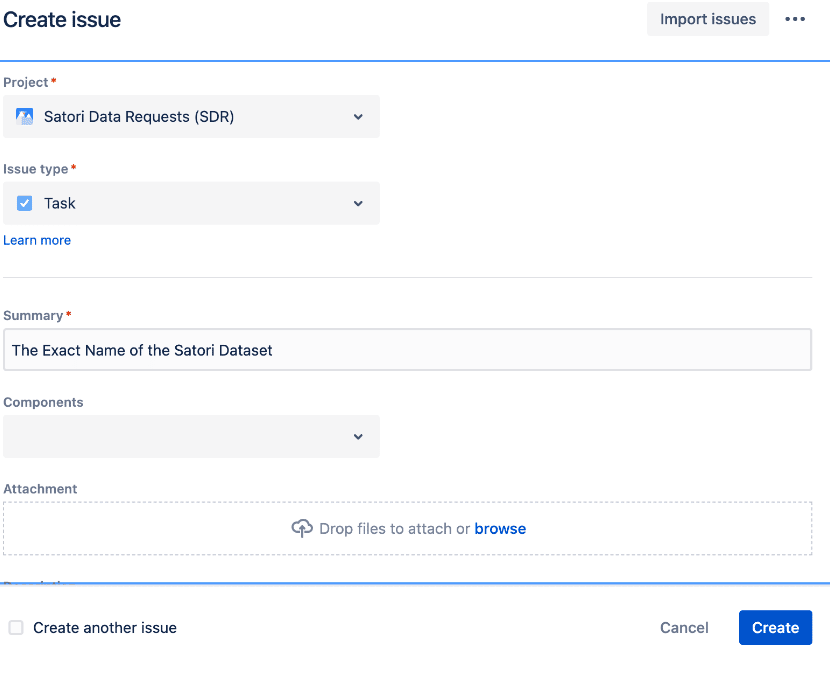
To keep things simple in this example, we are going to use the Summary field as the name of our Satori Dataset.
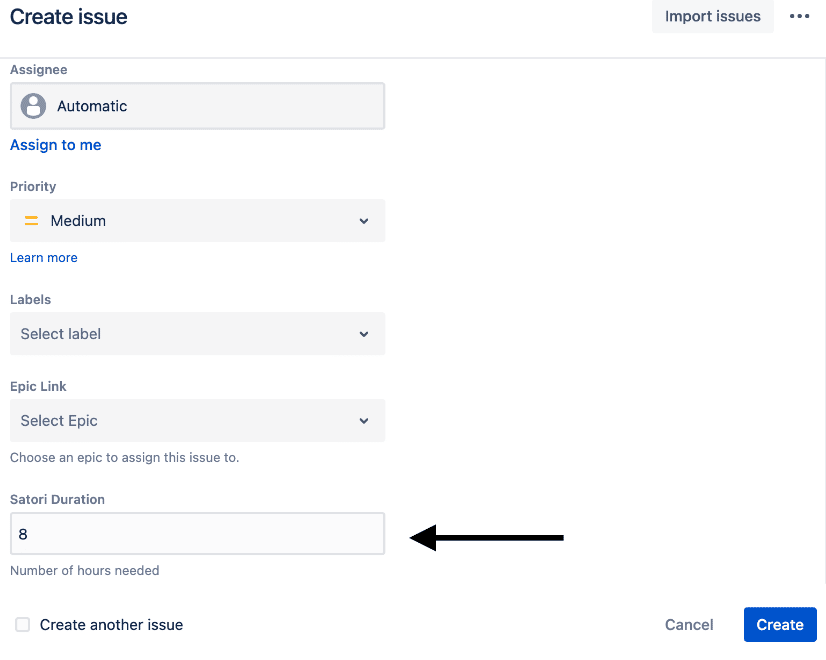
When you scroll down in this create dialogue, you will see your new Satori Duration field. In this example the user has access to the data for 8 hours:
2. Create the Jira Automation Rule
In Jira, navigate to System, then Global Automation
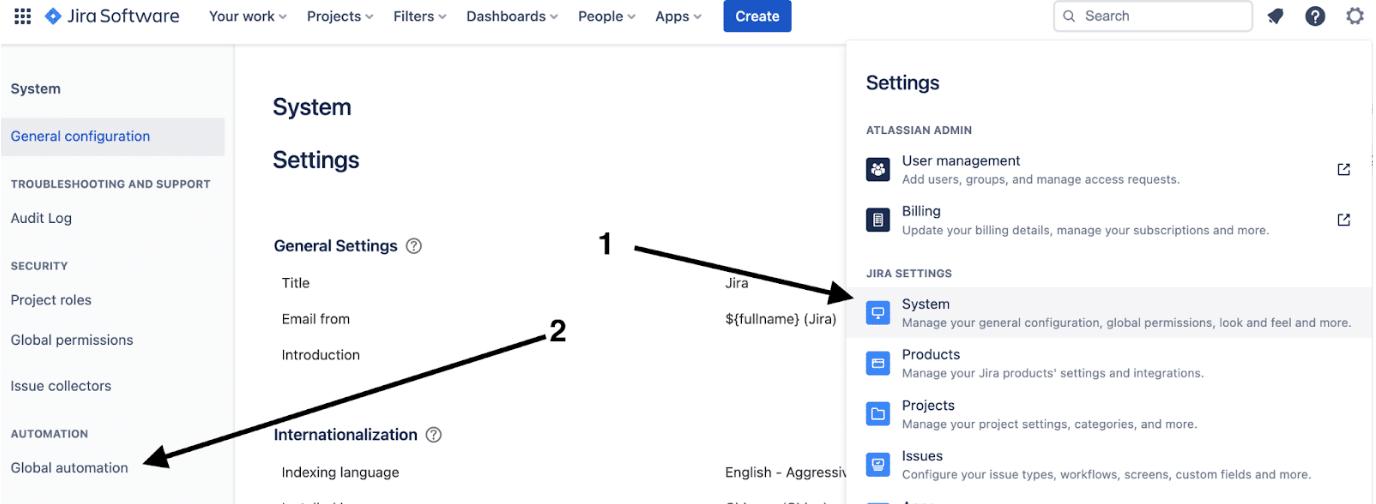
Then choose Create Rule

How you define the automation rule depends on your business process or workflow. This rule determines when a call is triggered to the Satori relay server code and Satori’s Rest API. There is no right answer here.
Your Jira implementation will differ from everyone else’s. In this example, we identify two easy choices.
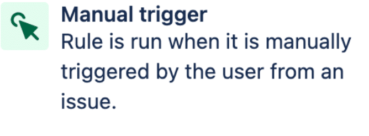
a. Manually by User Action
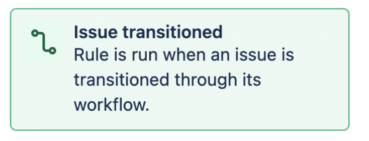
b. When an Issue or Task Transitions to a New Status
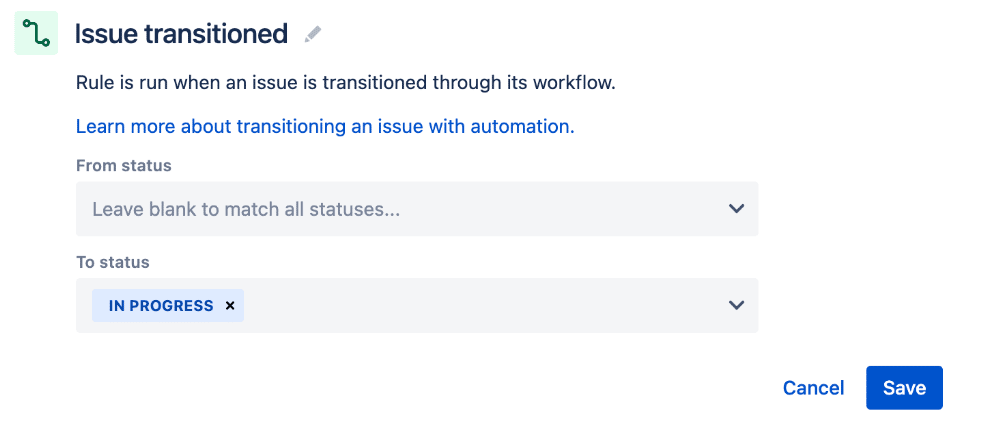
In this example, we describe a solution using the issue transition approach. To keep things simple, we want to trigger this rule if the status of the Jira task changes to In Progress.
3. Move the Issue to In Progress Status
When the issue is In Progress a web request is sent to a Satori Rest API.
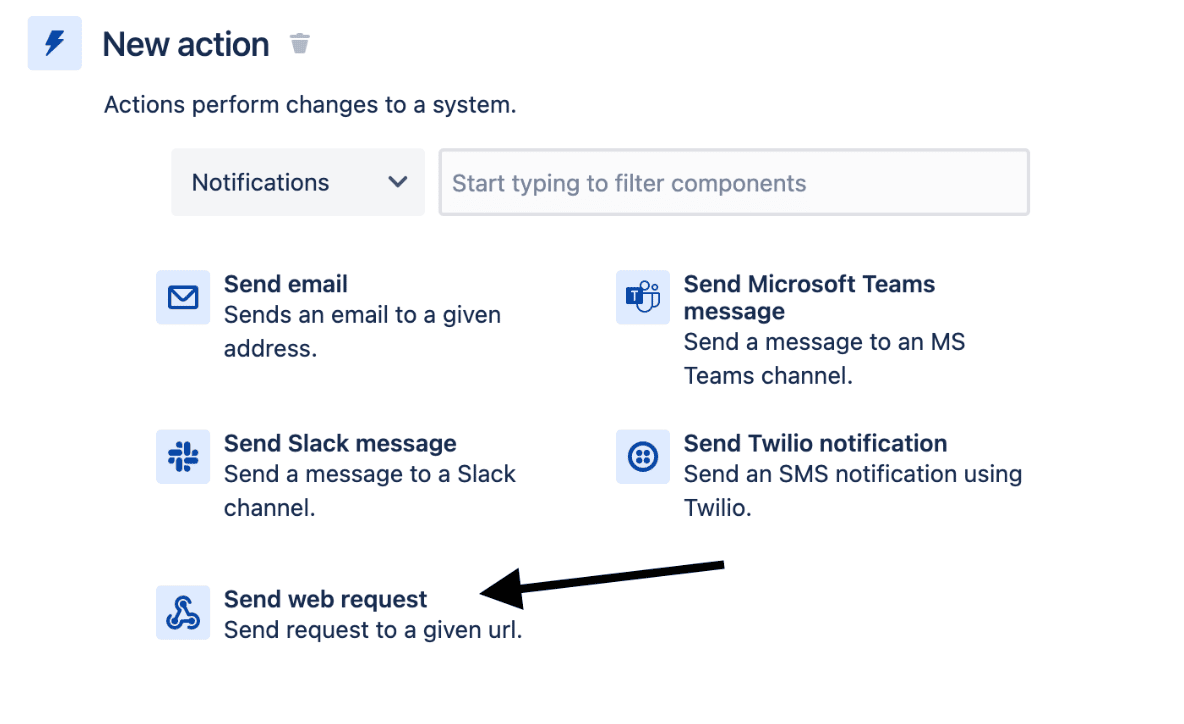
Next, we add a New Action:
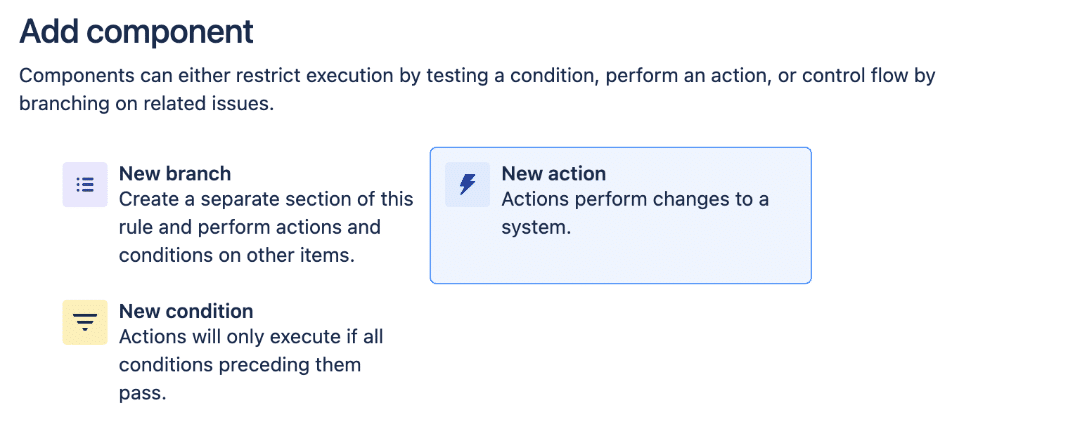
And then we choose Send Web Request from the Notifications section of possible New Actions:
You should see something like the following (it is partially filled out, but still incomplete at this point):
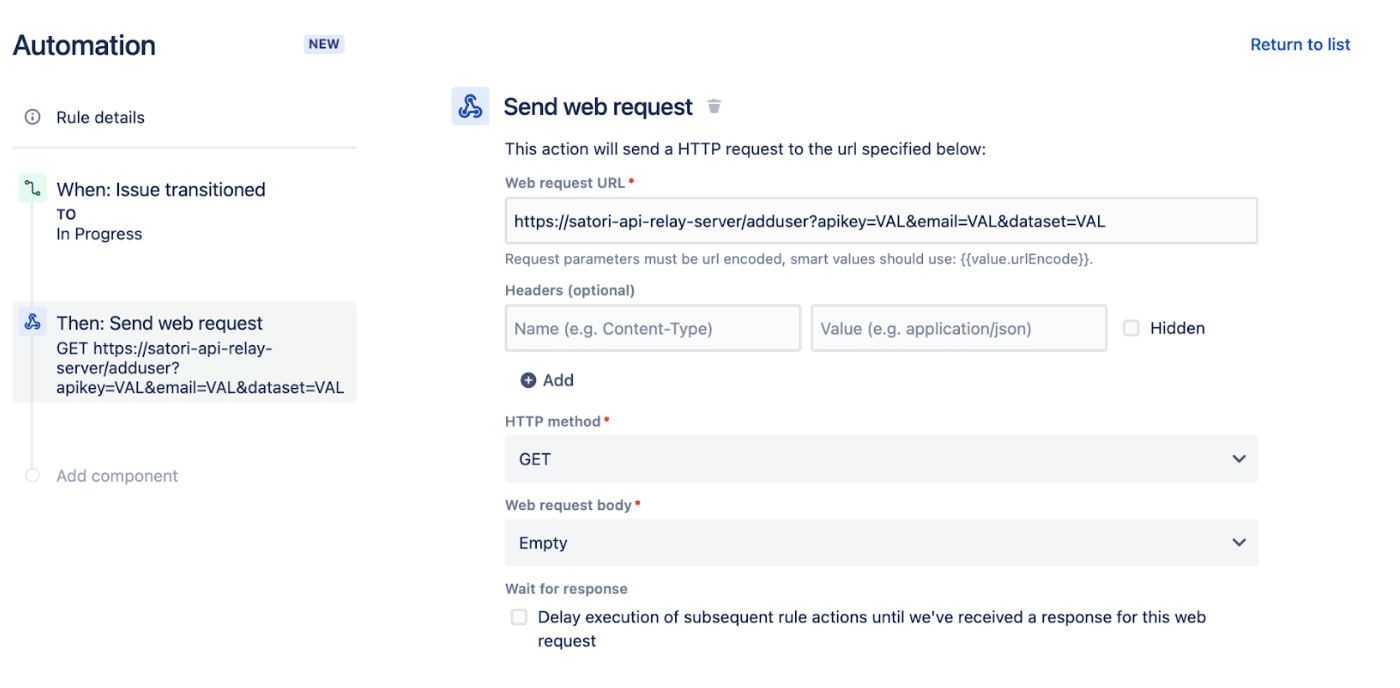
Recommendation. Up to this point, the integration is between Jira and the Satori Rest API. However, with Atlassian Jira, there are limited methods of retrieving and using session variables/data. Therefore, we highly recommend using a relay server between Jira and the Satori Rest API.
This is a developer-led process and does require a solution specifically tailored to your environment.
Satori provides a getting-started wireframe relay server written in Python Flask to aid you in this process.
Once up and running, this relay server expects a specific URL from any external system e.g. JIRA:
http://<the.gcloud.deployed.url.app>/satori/user/add?apikey=YOURAPIKEY&dataset=Secured%20Data&email=john123.789smith@gmail.com&duration=20&security_policy_id=SATORI_SECURITY_POLICY_ID
If you have not made changes to our Sample Relay Server, then the Web Request URL should look like this:

The URL itself looks like this:
https://satori-api-server-dfskdlfjass-wl.a.run.app/satori/user/add?dataset={{issue.summary.urlEncode}}&duration={{issue.Satori Duration}}&apikey=YOURAPIKEY&email={{issue.reporter.emailAddress.urlEncode}}&security_policy_id=SATORI_POLICY_ID
Where:
- /satori/user/add is the URI path for triggering a call to add a user; /satori/user/remove is the other path, to remove a user
- https://satori-api-server-dfskdlfjass-wl.a.run.app is the name of the Google Cloud Run deployment server – change this as needed.
- {{issue.summary.urlEncode}} is a) the summary of the Jira data request, and also b) the name of the Satori Dataset
- {{issue.Satori Duration}} is the duration field from these Jira data requests
- YOURAPIKEY is the relay server’s API key, which you configure at runtime when deploying the relay server to Google Cloud Run.
- {{issue.reporter.emailAddress.urlEncode}} is the email address that we will add to the Satori Dataset access list. In this example, it’s the current Jira “reporter” but could also be another Jira field, e.g. “assigned to”.
- SATORI_POLICY_ID is The Satori Security Policy to use for this assignment. Policy IDs must be looked up in the Satori UX and known before this configuration.
The completed automation step for Send Web Request looks like this:
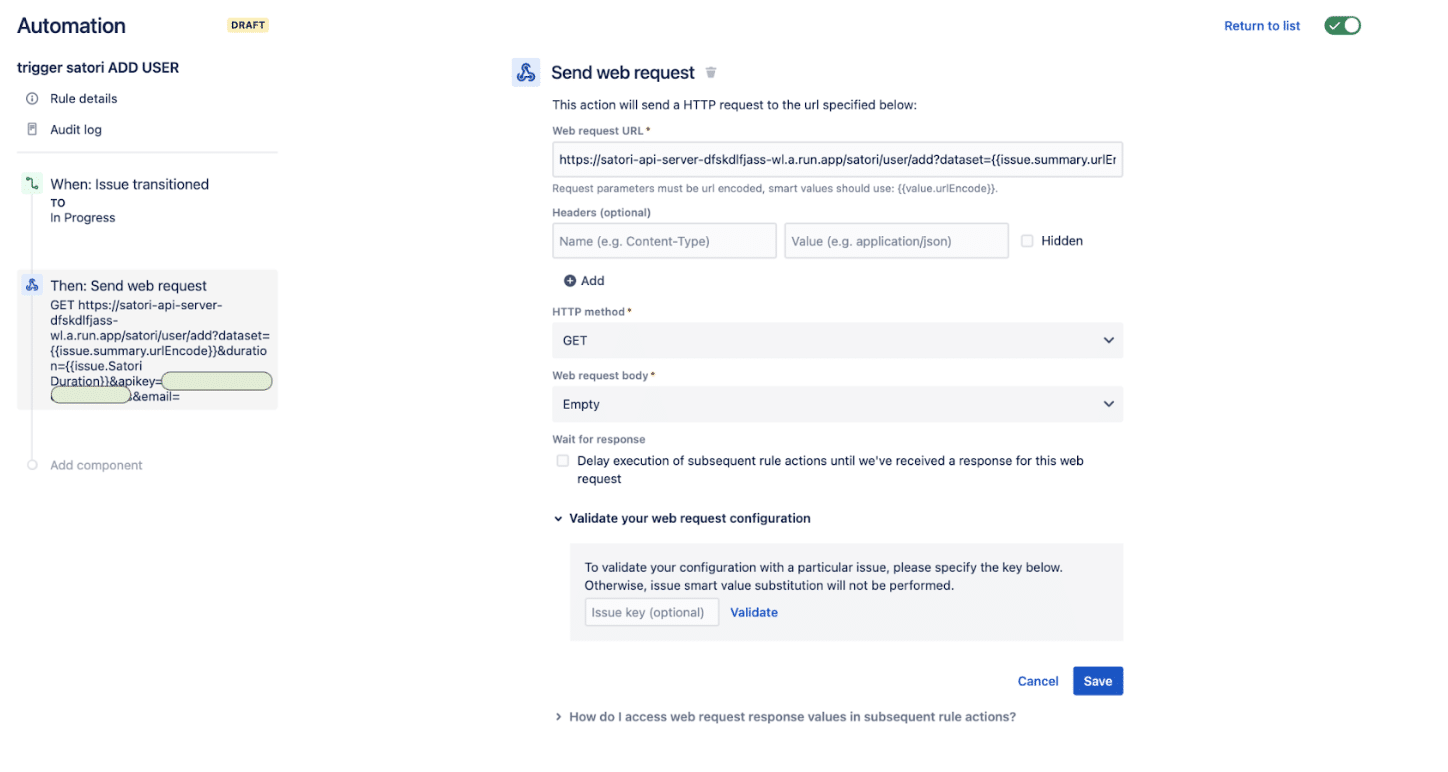
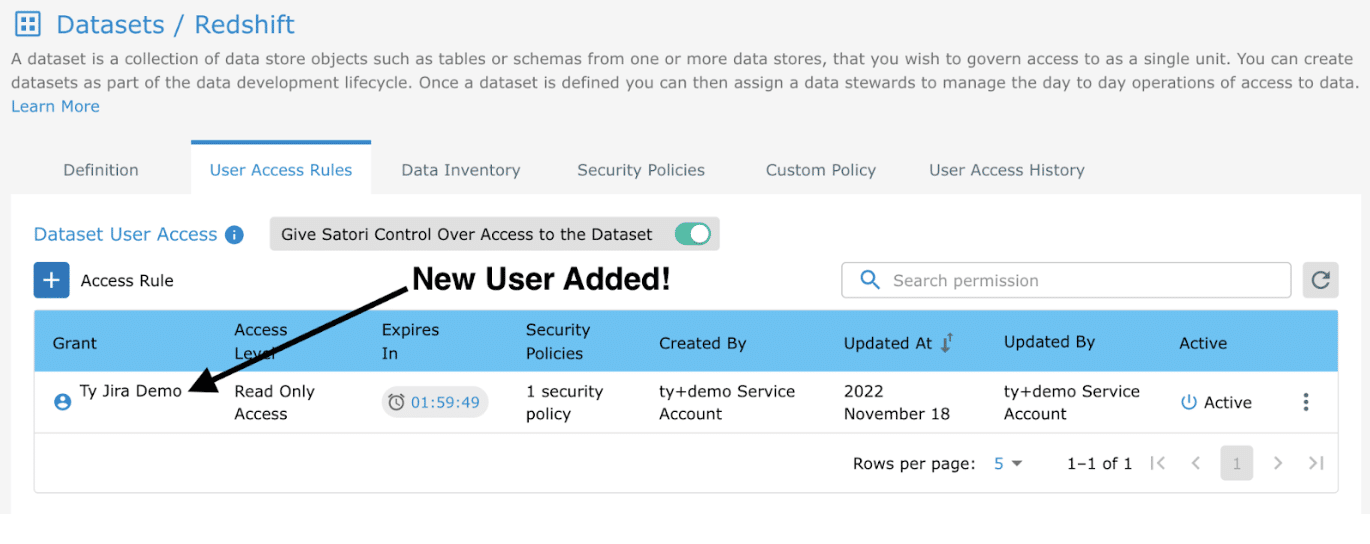
The relay server adds the current issue owner’s email to the access list for the requested Satori Dataset.
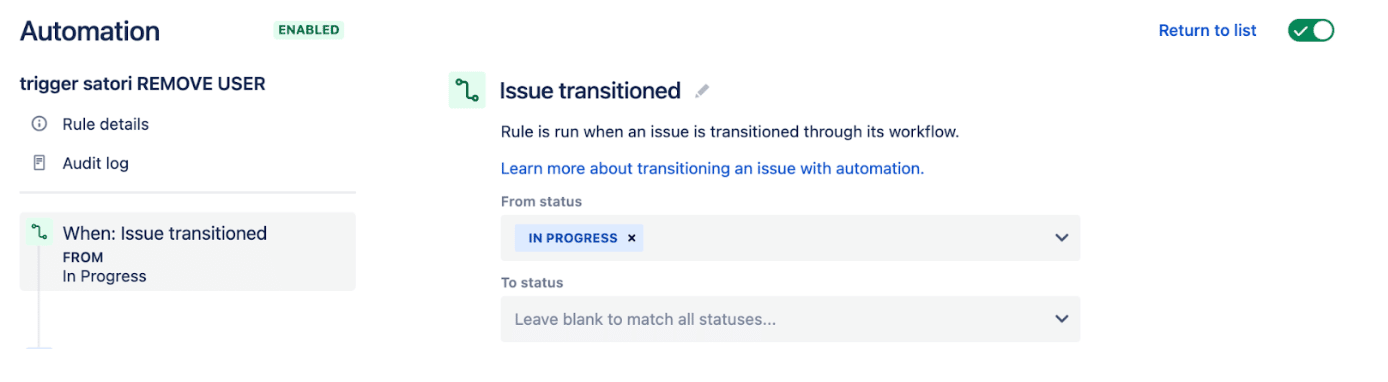
4. The Task is Moved to Status Done
When the data access task is moved to Done we need a second automation rule to remove the user.
In this example, we defined the criteria if the ticket moves from In Progress to any other status.
A second web request is sent that is almost identical to the Add User.
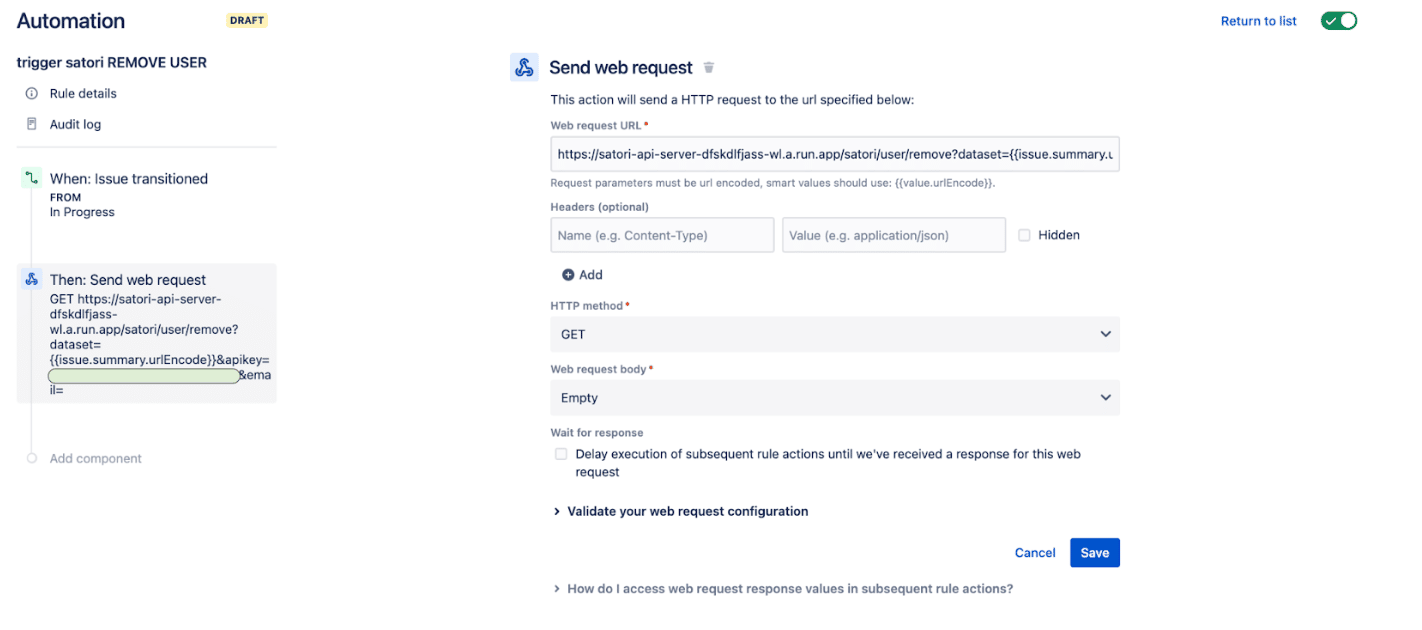
Although there are a few differences.
- The path is now /satori/user/remove
- We no longer need the duration field
- We no longer need the Policy ID field
The URL now looks like this:
https://satori-api-server-dfskdlfjass-wl.a.run.app/satori/user/remove?dataset={{issue.summary.urlEncode}}&apikey=YOUR_API_KEY&email={{issue.reporter.emailAddress.urlEncode}}
This second request removes the current user from the access list for the Satori Dataset.
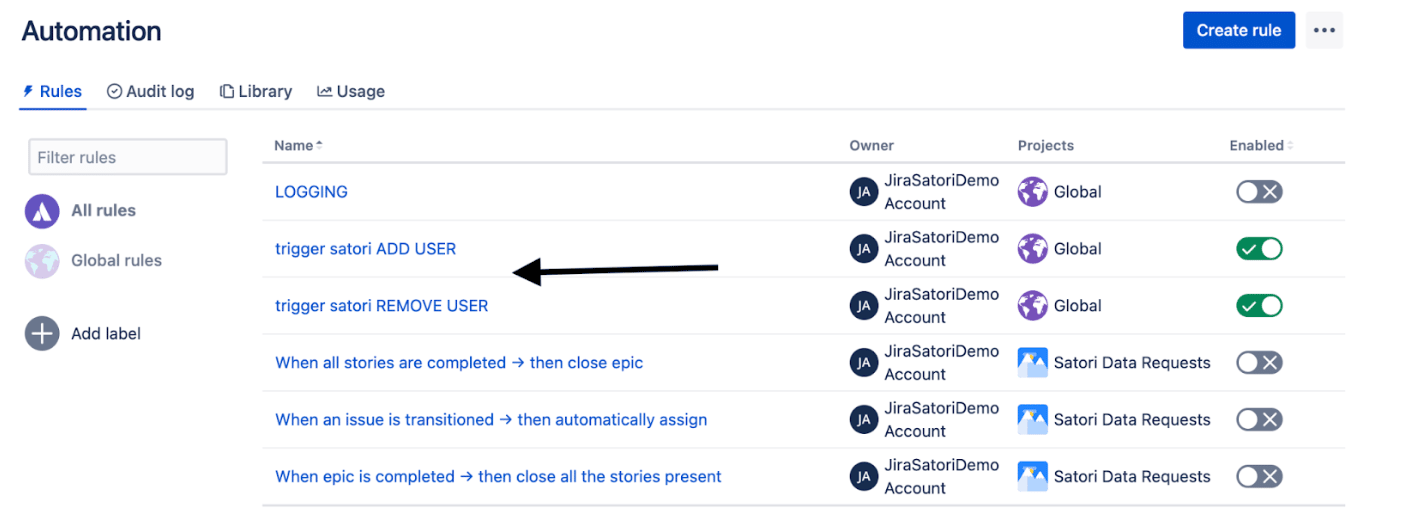
At the end of this Jira configuration, you have two automation rules to trigger Satori.
By creating a new Jira record type Data Access Request, you can envision linking these records to another Jira record type. Jira has strong support for linked records which allows for powerful workflow ideas.
To ensure that everything is working correctly and users are automatically added and removed, we run a quick test.
Testing / Observability
- Create a new Jira ticket where
- The Summary field matches the name of a Satori Dataset that you have configured, and
- The Satori Duration field has a value, e.g. “2” or similar.
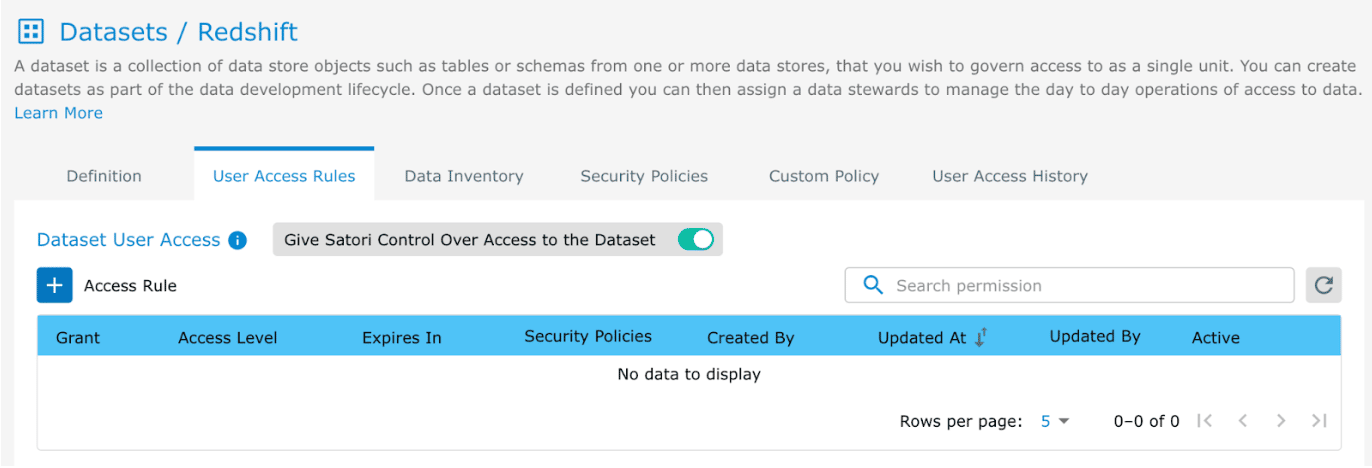
- We are using a Satori Dataset called “Redshift” with no users.
3. Create a Jira ticket called “Redshift”.
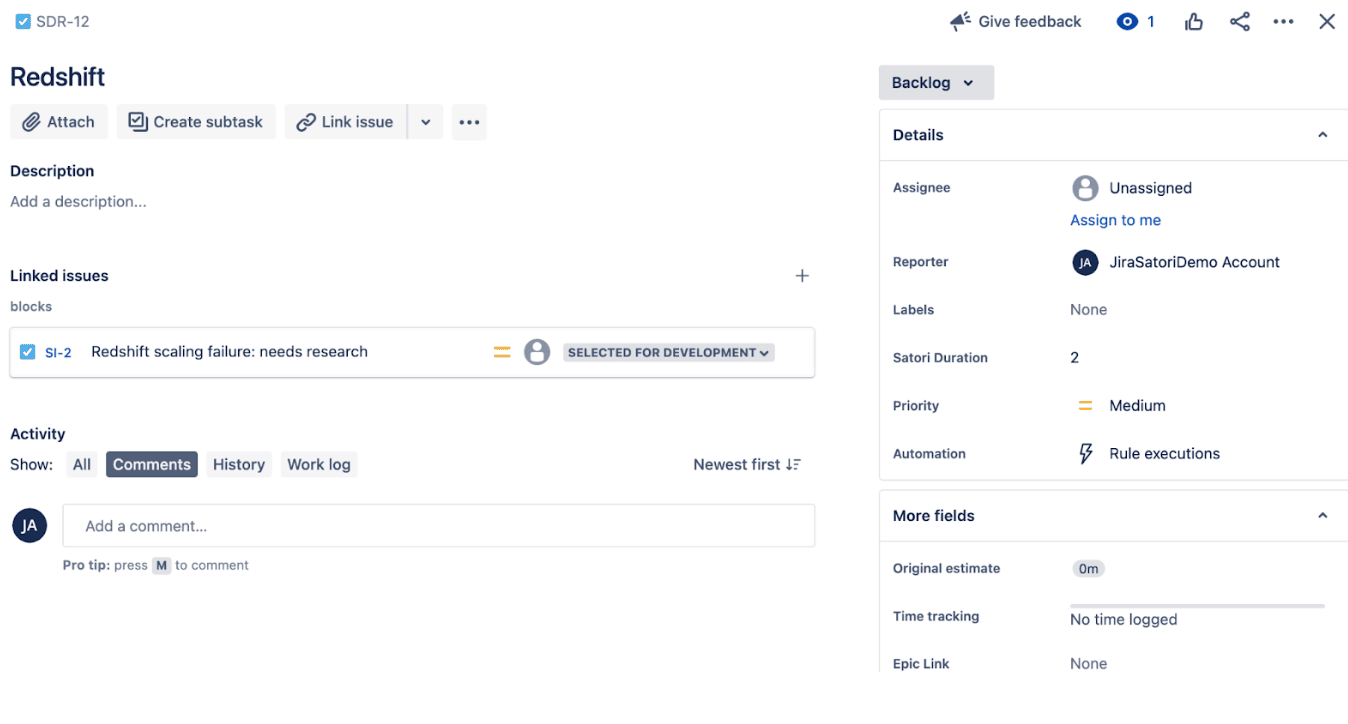
4. When you move this ticket from status Backlog to status In Progress, it will add the current Jira user to the list of access users for the Satori Dataset.
5. Back in Jira, when you change the status from In Progress to any other status, the user is then removed.
Conclusion
Integrating Jira with Satori enables your organization to capitalize on increased productivity while simultaneously reducing engineering resources. The ability to implement automated access controls helps data to move quickly and easily across the organization without relying on cumbersome ticketing systems and overprivileged access to sensitive data. This helps your organization increase both security and productivity.
To learn more about Satori:
- Book a demo with one of our experts
- Learn more about Self-service access to data
- Learn more about Fine-grained access controls